Contents
- STEP 1: BACKUP the physical PC
- STEP 2: Setup the P2V VM in Vmware Workstation 11 and restore the backup
- STEP 3: I tested PXE booting with another VM using a dedicated network segment.
- STEP 4: Upgrade the ISOs in the VM to latest Knoppix and SystemRescueCd (TODO)
- STEP 5: V2P: Reverse the process and upgrade the physical box with all the updates from the VM
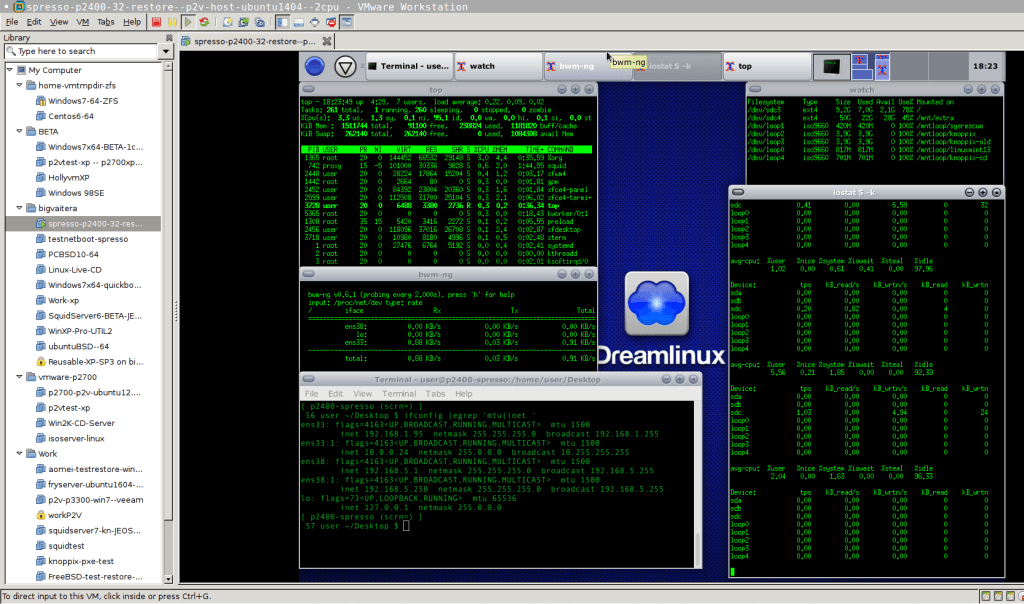
MARCH 2017 – so I’ve had an old PXE an ASUS Spresso (S-presso) with a Pentium-4 sitting around for the last few years, and got a wild hair to do a P2V (Physical-to-Virtual) installation on it. First, I had to make sure it still works right after attempting an OS upgrade of Debian Testing (in a VM) to modern standards. Last time this box was booted was November 2013 and it was provisioned with “Dreamlinux 5″ back in January of 2012.
Thankfully, the SATA drive and CMOS battery have survived with apparently no ill effects, since the box has been moved around through a couple of house changes with no special storage arrangements – it’s basically been “unpowered” sitting in a corner.


( NOTE these are stock images. My unit has a PCI slot on the right that has a Gig Ethernet card in it and an unused AGP video card slot on the left. The motherboard only supports 100Mbit Ethernet. )
A few notes about PXE:
REFERENCE - https://en.wikipedia.org/wiki/Preboot_Execution_Environment
PXE HOWTO - https://debian-administration.org/article/478/Setting_up_a_server_for_PXE_network_booting
Tools used:
- FSArchiver
- Vmware Workstation 11
- SystemRescueCd
- KNOPPIX
- GParted
STEP 1: BACKUP the physical PC
This 32-bit box is so old, I had to install FSArchiver (my preferred bare-metal backup program) manually. Incidentally, it also weighs a ton with a DVD drive and a standard SATA hard drive, so removing the DVD and converting to an SSD (or laptop drive) to save weight and would be recommended if I wanted to haul it around.
(Commands entered on Physical box, bash shell, as root)
apt update && apt install fsarchiver -y
apt update && apt install fsarchiver -y
ddir=/mnt/extra
outfile=spresso-p2v-backup-20170302.fsarchive.fsa
rootdev=/dev/sda3
time fsarchiver -o -A -z 1 -j 2 savefs \
$ddir/$outfile \
$rootdev
cd $ddir
fsarchiver archinfo $outfile 2> flist--$outfile.txt
I then copied “spresso-p2v-backup-20170302.fsarchive.fsa” to my ZFS file server (method omitted), since we will need it later for the restore.
Also, since all of my Squid cache and ISO files for PXE are on /mnt/extra on the Spresso, I made a tar backup of those to my ZFS server.
cd /mnt/extra
time tar czpf /mnt/bkpspace/spresso-mnt-extra-bkp-20170302.tgz *
STEP 2: Setup the P2V VM in Vmware Workstation 11 and restore the backup
I tried as much as possible for the VM settings to duplicate the physical box, but in this case I already had a P2V VM of my daily workstation (XUbuntu 14.04 LTS) that I wasn’t using, so adding a 3rd virtual drive to the existing VM and reusing the existing GRUB saved me some steps. Running
‘ update-grub ‘ on the Ubuntu side after restoring enabled me to boot my restored environment.
VM details:
RAM: 1.5GB
Processors: 1
SCSI1: 23.5GB (this is the Ubuntu drive)
SCSI2: 20GB ( this is /home and swap )
SCSI3: This was added “as new” and then Expanded from 10GB to 60GB (after running out of space)
Net1: Bridged (gets DHCP address from my LAN)
Net2: Started out as Host-only and ended up as LAN Segment – this enabled the “client” bare VM to boot over the network.

I used a SystemRescueCd ISO to boot the VM, issued ‘ startx ‘ and used ‘ fdisk ‘ to make 2 partitions that fairly closely matched my physical layout.
PROTIP: In hindsight, I should have made the root partition around 15-20GB because of all the package upgrades that needed to be downloaded. (I ran out of space on root once during the upgrade and had to issue an ‘ apt-get clean ‘ to free up space.)
sdc3: 10GB ext4 (restored root) – Advice: Make yours bigger.
sdc4: 50GB ext4 (/mnt/extra)
PROTIP: As root, run ‘ tune2fs -m1 /dev/sdc3 ‘ — this will also reduce the Reserved space for ext4 and give you some extra usable free space.
Now, since I had plenty of space to work with, I copied my FSArchiver backup file from my ZFS server to the 50GB VM partition.
(Still in SystemRescueCd, in the VM)
mkdir /mnt/tmp
mount /dev/sdc4 /mnt/tmp
cd /mnt/tmp
ifconfig # Make note of my VM's IP address: 192.168.1.95
nc -l -p 32100 |tar xpvf -
##Netcat - Listen on port 32100 and untar whatever is received
(Now on my ZFS server)
tar cpf - spresso-p2v-backup-20170302.fsarchive.fsa |nc -w 5 192.168.1.95 32100
## (tar to stdout and stream a copy of the backup file to the VM's IP)
This is basically a quick-and-dirty way to transfer files over the network without resorting to FTP or slow SSH file copies – the fsarchive backup file ended up being around 3GB and transferred in less than a minute over Gig Ethernet.
Netcat REF: http://www.terminally-incoherent.com/blog/2007/08/07/few-useful-netcat-tricks/
Now to restore the backup:
(still in SystemRescueCd, in the VM)
time fsarchiver restfs spresso*.fsa id=0,dest=/dev/sdc4
And that’s half the battle right there. Now we just need to make some changes to the restored /etc/fstab so it will boot. ( If we were doing a full migration, we would also need to adjust things like /etc/network/interfaces , /etc/rc.local , /etc/hostname , and /etc/hosts )
For completeness, here’s more info on how to do a Linux bare-metal backup and restore:
REF: http://crunchbang.org/forums/viewtopic.php?id=24268
So now I ‘ reboot ‘ into the VM’s already-installed Ubuntu 14.04 and edit my Dreamlinux /etc/fstab.
mkdir /mnt/tmp
mount /dev/sdc3 /mnt/tmp
screen -aAO # PROTIP: GNU screen is invaluable for switching between virtual terminal windows
fdisk -l # check out our disks
blkid # get partition labels and UUIDs
/dev/sdb2: LABEL="swapb" UUID="f0eb7148-4ff2-4eeb-a82c-349d384a5255" TYPE="swap" PARTUUID="ff1ca075-02"
/dev/sdc3: LABEL="root" UUID="38f1d4be-3293-4272-ab79-4ad76cbd5a36" TYPE="ext4" PARTUUID="3a3b65f3-03"
/dev/sdc4: LABEL="extra" UUID="603a61fc-4436-4cb0-baac-ef9170754228" TYPE="ext4" PARTUUID="3a3b65f3-04"
NOTE that FSArchiver will by default restore the same UUID and filesystem label, so no worries – we don’t have to modify the VM’s fstab entry for the root filesystem.
( Now Hit Ctrl-A, then c to create a new Screen )
cd /mnt/tmp/etc
jstar fstab
( Use your own editor here. I happen to like Wordstar keybindings. )
Now we can switch between those 2 virtual terminal windows and even copy/paste text without using the mouse. (See ‘ man screen ‘ for more details.)
To make a long story short, I added or verified the following to SpressoVM’s /etc/fstab to enable my existing swap partition and double-check that the root filesystem would be mounted as expected.
LABEL=swapb none swap sw,pri=2 0 0
LABEL=extra /mnt/extra ext4 defaults,noatime,rw 0 2
While I’m here, I also restored the /mnt/extra files from their tar backup as well.
umount /mnt/tmp # we're done with restored root
mount /dev/sdc4 /mnt/tmp
cd /mnt/tmp
nc -l -p 32100 | tar xzpvf -
( then on my ZFS Server )
cd /mnt/bkpspace; time cat spresso-mnt-extra-bkp-20170302.tgz |nc -w 5 192.168.1.95 32100
( now back in the VM )
update-grub # make sure ubuntu knows how to boot dreamlinux
reboot
And that’s pretty much it. After that, to make a long story short (again), I went through several cycles of ‘ apt upgrade ‘ and ‘ apt-get dist-upgrade ‘ making VM Snapshots along the way, and I had to make allowances for files that were provided in more than one package.
I also upgraded the kernel to linux-image-4.9.0-1-686. The full saga is documented with errors and fixes, so email me if you want to know more (but it’s a pretty long read.)
apt-cache search 4.9.0 |awk '{print $1}'
apt-get install linux-headers-4.9.0-1-686 linux-headers-4.9.0-1-686-pae \
linux-headers-4.9.0-1-all linux-headers-4.9.0-1-common linux-support-4.9.0-1 \
linux-image-4.9.0-1-686-pae
STEP 3: I tested PXE booting with another VM using a dedicated network segment.
The end result of all this: I created a “blank” VM with the capability to boot from network (needed to modify the VM’s BIOS for this by pressing F2 at boot) and after switching the 2nd network adapter from “Host only” to “LAN segment” I successfully booted the VM from PXE! Mission Accomplished!
Now, since I’ve done all the heavy lifting in the VM and my original box is still working the same as it was (but running old software) I can use pretty much the same procedure to do a V2P (Virtual to Physical) to a spare 500GB laptop drive instead of having to repeat the upgrade all over again.
For brevity, these are the instructions I include in my bkpsys-2fsarchive script on how to Restore:
time fsarchiver restfs backup-root-sda1--ubuntu1404*.fsa id=0,dest=/dev/sdf1
Statistics for filesystem 0
* files successfully processed:....regfiles=159387, directories=25579, symlinks=49276, hardlinks=25, specials=108
* files with errors:...............regfiles=0, directories=0, symlinks=0, hardlinks=0, specials=0
real 4m26.116s
( 3.9GB )
mkdir /mnt/tmp2
mount /dev/sdf1 /mnt/tmp2
grub-install --root-directory=/mnt/tmp2 /dev/sdf
mount -o bind /dev /mnt/tmp2/dev; mount -o bind /proc /mnt/tmp2/proc; mount -o bind /sys /mnt/tmp2/sys
chroot /mnt/tmp2 /bin/bash
update-grub
[[
Generating grub configuration file ...
Warning: Setting GRUB_TIMEOUT to a non-zero value when GRUB_HIDDEN_TIMEOUT is set is no longer supported.
Found linux image: /boot/vmlinuz-4.2.0-36-generic
Found initrd image: /boot/initrd.img-4.2.0-36-generic
Found linux image: /boot/vmlinuz-3.19.0-25-generic
Found initrd image: /boot/initrd.img-3.19.0-25-generic
Found memtest86+ image: /boot/memtest86+.elf
Found memtest86+ image: /boot/memtest86+.bin
Found Ubuntu 14.04.4 LTS (14.04) on /dev/sda1
done
]]
grub-install /dev/sdf # from chroot
^D
umount -a /mnt/tmp2/*
# DON'T FORGET TO COPY /home and adjust fstab for swap / home / squid BEFORE booting new drive!
# also adjust etc/network/interfaces , etc/rc.local , etc/hostname , etc/hosts

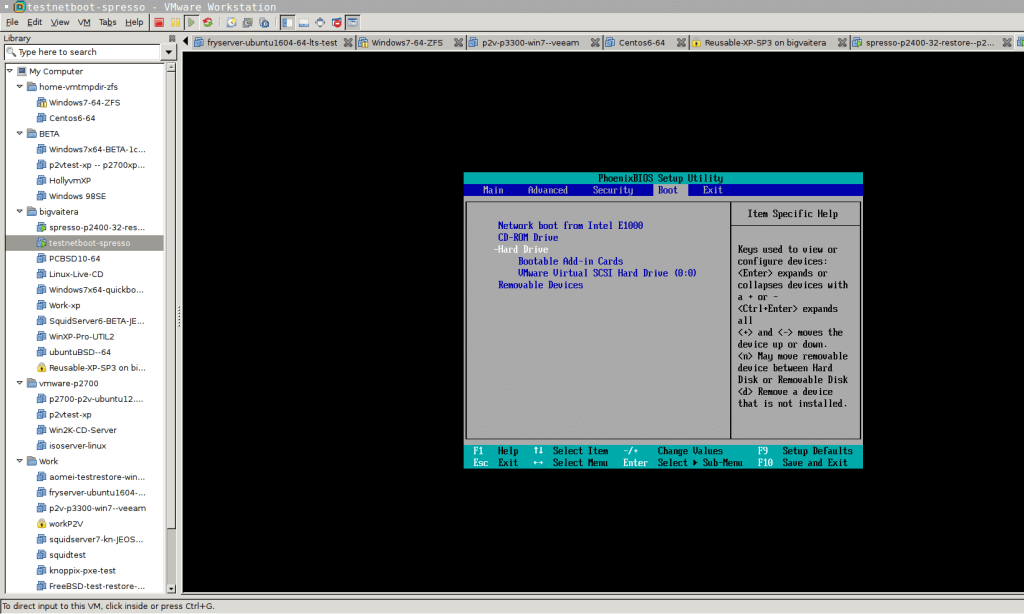
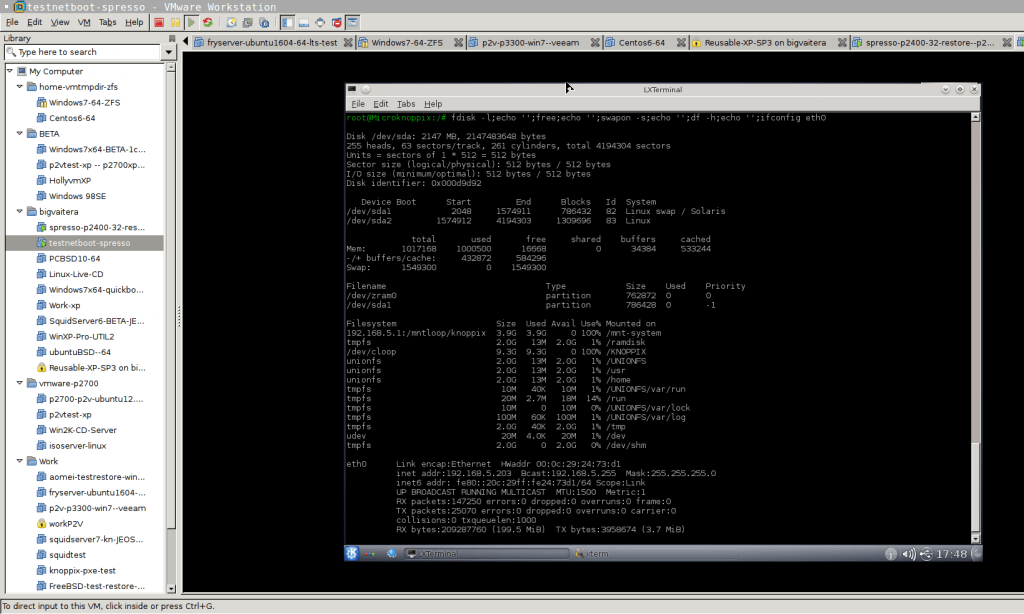
Once I had KNOPPIX up and running in the “blank” VM, I used ‘ GParted ‘ to make a 768MB Swap partition and used the rest as a “data” ext4 partition.
-Here’s the “client” VM booting over the network/PXE from my migrated Spresso VM:
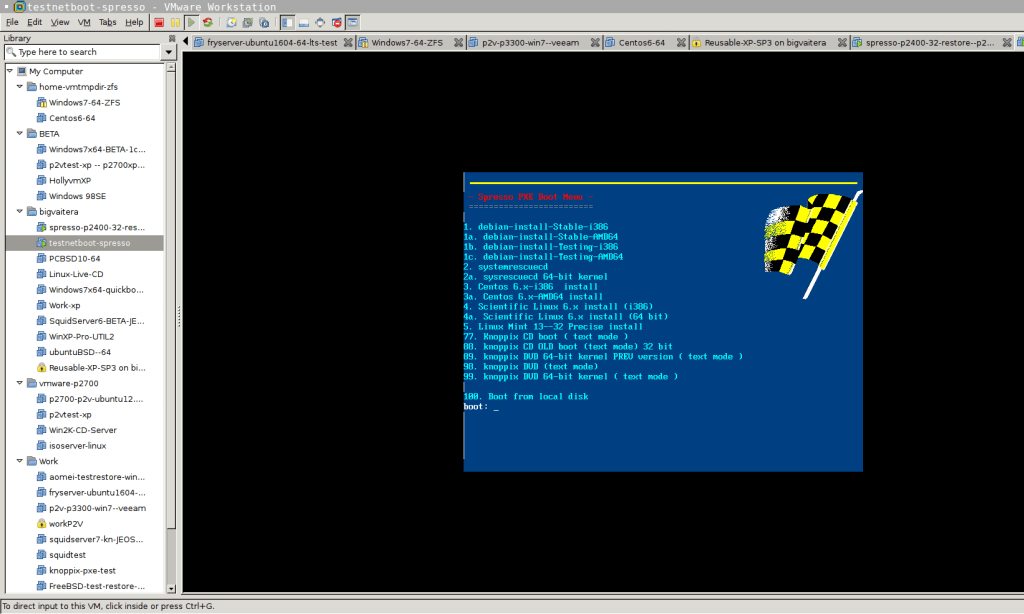
-NOTE that while the PXE box is running a 32-bit processor and environment, CLIENT boxes can boot a 64-bit kernel and environment as long as the CLIENT processor is capable.
-The way my PXE environment is setup, clients only have a limited network connection from the PXE server and have to download everything (including OS install packages) over the Squid proxy cache running on the Spresso’s port 3128 for extra security – client boxes can’t ping out to random websites and all downloads are logged.
Squid proxy REF: https://en.wikipedia.org/wiki/Squid_%28software%29
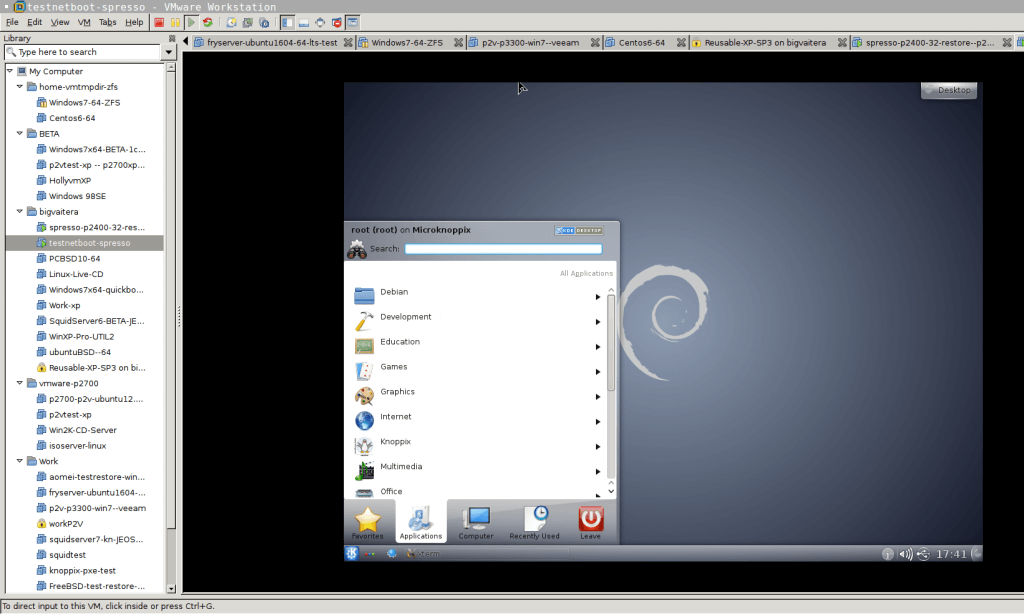
( After booting into text mode, I issued a ‘ startx startkde ‘ at the terminal prompt to get X up and running )
STEP 4: Upgrade the ISOs in the VM to latest Knoppix and SystemRescueCd (TODO)
STEP 5: V2P: Reverse the process and upgrade the physical box with all the updates from the VM
-I haven’t done the “V2P” - Virtual to Physical - part yet, but that’s not a high priority at this point since I have everything pretty much the way I like it right now. Maybe in a future update. 😉
