In the previous article, I showed you how to install Lubuntu 14.04 64-bit and install the important bits of Samba and the ZFS filesystem. In this article, I will give you the interesting details on how to get your Probox-connected disks up and running as a ZFS RAID10, starting with (1) disk and growing to a full 4-disk RAID10 in real-time. Please note: Follow these steps at your own risk. I take no responsibility for data loss! You will need to be careful and make sure you are using the right disks when entering administration commands.
It’s a common misconception that you can’t “grow” a ZFS RAIDZ. In fact, if you already have a RAIDZ, RAIDZ2, etc you can expand the free space – but only if you essentially duplicate the existing configuration, or replace the disks one at a time with bigger ones. There is more information here:
(See link’s Step 3): http://www.unixarena.com/2013/07/zfs-how-to-extend-zpool-and-re-layout.html
and here: http://alp-notes.blogspot.com/2011/09/adding-vdev-to-raidz-pool.html
Now, getting back to our project. First, you need to verify that the disks are detected by the OS. You can do this by entering (as root):
fdisk -l /dev/sd?
Depending on how many disks you have online in the Probox, you should see anything from sdb to sde:
Disk /dev/sdb: 1000.2 GB, 1000204886016 bytes
256 heads, 63 sectors/track, 121126 cylinders, total 1953525168 sectors
Sector size (logical/physical): 512 bytes / 4096 bytes
I/O size (minimum/optimal): 4096 bytes / 4096 bytes
Device Boot Start End Blocks Id System
/dev/sdb1 1 1953525167 976762583+ ee GPT
.
.
.
Disk /dev/sde: 1000.2 GB, 1000204886016 bytes
256 heads, 63 sectors/track, 121126 cylinders, total 1953525168 sectors
Sector size (logical/physical): 512 bytes / 4096 bytes
I/O size (minimum/optimal): 4096 bytes / 4096 bytes
Device Boot Start End Blocks Id System
/dev/sde1 1 1953525167 976762583+ ee GPT
If you get warnings like the following, you can ignore them:
Partition 1 does not start on physical sector boundary.
WARNING: GPT (GUID Partition Table) detected on '/dev/sde'! The util fdisk doesn't support GPT. Use GNU Parted.

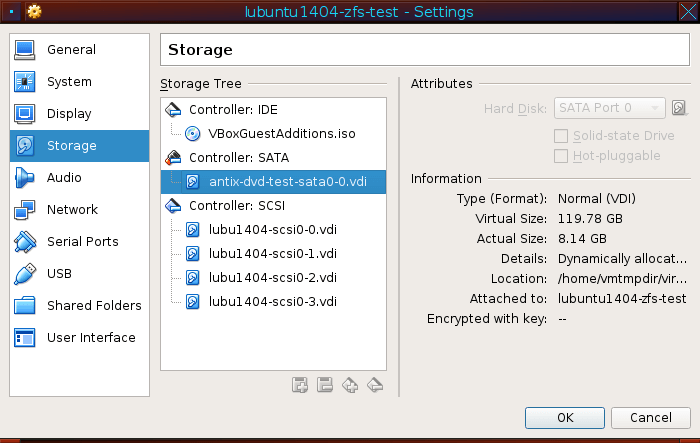
This is an example of how to setup your Virtualbox storage. Use a SATA controller for the Linux root (I used 120GB to duplicate my laptop’s SSD) and a SCSI controller for the ZFS disks to duplicate the Probox. The ZFS disks should all be the same size, whether 1GB for testing or 1TB.
To get a short list of the disks on your system, you can do this:
ls -l /dev/disk/by-id |egrep -v 'part|wwn'
lrwxrwxrwx 1 root root 9 Mar 31 10:47 ata-TSSTcorp_CDDVDW_SH-S222A -> ../../sr0
lrwxrwxrwx 1 root root 9 Mar 31 10:47 ata-WDC_WD10EFRX-68FYTN0_WD-WCC4J1 -> ../../sdb
lrwxrwxrwx 1 root root 9 Mar 31 10:47 ata-WDC_WD10EFRX-68FYTN0_WD-WCC4J3 -> ../../sdd
lrwxrwxrwx 1 root root 9 Mar 31 10:47 ata-WDC_WD10EFRX-68FYTN0_WD-WCC4J4 -> ../../sde
lrwxrwxrwx 1 root root 9 Mar 31 10:47 ata-WDC_WD10EFRX-68FYTN0_WD-WCC4J6 -> ../../sdc
lrwxrwxrwx 1 root root 9 Mar 31 10:47 usb-Samsung_Flash_Drive_FIT_03557150-0:0 -> ../../sda
If you’re wanting to test this process in Virtualbox first, use ” /dev/disk/by-path ” instead.
This will display the long-form device name and the symlink to the short device name. The ‘egrep -v‘ part leaves out anything in the list that matches partitions and WWN device names. At any rate, we need to concentrate on the ata-WDC names in this case, because those will be our ZFS pool drives.
To start with, we should always run a full burn-in test of all physical drives that will be allocated to the ZFS pool (this can take several hours) – skip this at your own peril:
time badblocks -f -c 10240 -n /dev/disk/by-id/ata-WDC_WD10EFRX-68FYTN0_WD-WCC4J1 \
2>~/disk1-badblocks.txt &
This will start a non-destructive Read/Write “badblocks” disk-checker job in the background that redirects any errors to the file ” /root/disk1-badblocks.txt “.
Then you can hit the up-arrow and start another job at the same time, substituting the ata-WDC drive names and the disk numbers as needed:
dsk=2; time badblocks -f -c 10240 -n /dev/disk/by-id/ata-WDC_WD10EFRX-68FYTN0_WD-WCC4J3 \ 2>~/disk$dsk-badblocks.txt &
And so on. Just make sure you change the “ata-” filenames, and you can check all 4 disks at the same time.
If you would rather do this programmatically:
for d in `ls -1 /dev/disk/by-id/ata-WDC_WD10* |egrep -v 'part|wwn'`; do echo "time badblocks -f -c 10240 -n -s -v $d 2>>~/disk-errors.txt &"; done
Which will result in something like the following:
time badblocks -f -c 10240 -n -s -v /dev/disk/by-id/ata-WDC_WD10EFRX-68FYTN0_WD-WCC4J1 2>>~/disk-errors.txt &
time badblocks -f -c 10240 -n -s -v /dev/disk/by-id/ata-WDC_WD10EFRX-68FYTN0_WD-WCC4J3 2>>~/disk-errors.txt &
time badblocks -f -c 10240 -n -s -v /dev/disk/by-id/ata-WDC_WD10EFRX-68FYTN0_WD-WCC4J4 2>>~/disk-errors.txt &
time badblocks -f -c 10240 -n -s -v /dev/disk/by-id/ata-WDC_WD10EFRX-68FYTN0_WD-WCC4J6 2>>~/disk-errors.txt &
You can then copy/paste those resulting commands in the root terminal to run all 4 jobs at once, although they will all be logging errors to the same log file.
To get an idea of what is going on and see when the “badblocks” jobs are finished, you can open up another non-root Terminal (or File\Tab) and issue:
sudo apt-get install sysstat## You will only need to do this ONCE
iostat -k 5## This will update every 5 seconds until ^C (Control+C) is pressed
Linux 4.4.0-57-generic (hostname) 03/31/2017 _x86_64_ (1 CPU)
avg-cpu: %user %nice %system %iowait %steal %idle
1.10 0.00 2.20 47.19 0.00 49.50
Device: tps kB_read/s kB_wrtn/s kB_read kB_wrtn
sda 0.00 0.00 0.00 0 0
sdc 0.00 0.00 0.00 0 0
sdd 108.00 37478.40 38912.00 187392 194560
sde 0.00 0.00 0.00 0 0
sdb 77.60 38912.00 38707.20 194560 193536
Once all the badblocks jobs are done (everything in the “kB_wrtn” column should go back to 0), it’s a good idea to check the /root/disk*.txt files to see if anything was found:
cat /root/disk*.txt
Of course, if anything really bad was found, you might want to delve in deeper and possibly replace the disk. If everything turns out OK, we can start by creating our initial ZFS pool using the first disk.
(Please note, the following commands assume you are using the BASH shell to enter commands)
export zp=zredpool1## Define our ZFS pool name – call yours whatever you like
export dpath=/dev/disk/by-id
PROTIP: If using Virtualbox, you would want to use /dev/disk/by-path
declare -a zfsdisk ## Declare a Bash array
zfsdisk[1]=$dpath/ata-WDC_WD10EFRX-68FYTN0_WD-WCC4J1# Use whatever disk is appropriate to your system for the 1st disk in your pool
zfsdisk[2]=$dpath/ata-WDC_WD10EFRX-68FYTN0_WD-WCC4J3# Use whatever disk is appropriate to your system for the 2nd disk, if applicable
…and so on, for disks 3 and 4.
STEP 1: Initialize the disk(s) with GPT partition table
zpool labelclear ${zfsdisk[1]}; parted -s ${zfsdisk[1]} mklabel gpt
Repeat the below command, changing the number for each pooldisk – 2, 3, 4 as applicable:
dsk=2; zpool labelclear ${zfsdisk[$dsk]}; parted -s ${zfsdisk[$dsk]} mklabel gpt
Once those are done, all of your Probox disks should be initialized with a new GPT label and ready for use with a ZFS filesystem, even if they had previously been used in a pool. Check with this:
parted -l
Model: ATA WDC WD10EFRX-0 (scsi)
Disk /dev/sdb: 1000GB
Sector size (logical/physical): 512B/4096B
Partition Table: gpt
If for some reason the disks aren’t properly partitioned, you can ‘ apt-get install gparted ‘ as root and use ‘ sudo gparted ‘ as your non-root user to partition them manually.
Now for the EASY part – Create your initial ZFS pool using only 1 disk:
STEP 2: Create the Zpool
time zpool create -f -o ashift=12 -O compression=off -O atime=off $zp \
${zfsdisk[1]}
zpool set autoexpand=on $zp# Set some necessary options for expansion
zpool set autoreplace=on $zp
df /$zp
Filesystem 1K-blocks Used Available Use% Mounted on zredpool1 942669440 128 942669440 1% /zredpool1
And you should have a 1-disk ZFS pool. 🙂 You can immediately start copying data to the pool if you want. BUT – we have no Redundancy yet!!
zpool status |awk 'NF>0'## this will skip blank lines in output
pool: zredpool1
state: ONLINE
scan: none requested
config:
NAME STATE READ WRITE CKSUM
zredpool1 ONLINE 0 0 0
ata-WDC_WD10EFRX-68FYTN0_WD-WCC4J1 ONLINE 0 0 0
errors: No known data errors
Now if you already have the 2nd disk online and ready to go, we can add another drive on the fly to our 1-disk pool to make it RAID1 (mirrored):
STEP 3: Add a Mirror Disk to the 1-Disk Pool
time zpool attach $zp \
${zfsdisk[1]} ${zfsdisk[2]}
If you’re browsing this webpage on the same computer you’re creating your ZFS pool on, copy and paste this into your root terminal after entering the above command, especially if you already have “jumped the gun” a bit and copied some files to your new ZFS pool:
function waitforresilver () {
printf `date +%H:%M:%S`' ...waiting for resilver to complete...'
waitresilver=1
while [ $waitresilver -gt 0 ];do
waitresilver=`zpool status -v $zp |grep -c resilvering`
sleep 5
done
echo 'Syncing to be sure...'; time sync;
date
}
waitforresilver
Otherwise, just keep issuing ‘ zpool status ‘ every minute or so and/or monitoring things with ‘iostat’ in your non-root terminal until the resilver is done. You’ll get your prompt back when the ZFS disk-mirroring process is completed.
zpool status |awk 'NF>0'
pool: zredpool1
state: ONLINE
scan: resilvered 276K in 0h0m with 0 errors on Sat Apr 1 11:48:58 2017
config:
NAME STATE READ WRITE CKSUM
zredpool1 ONLINE 0 0 0
mirror-0 ONLINE 0 0 0
ata-WDC_WD10EFRX-68FYTN0_WD-WCC4J1 ONLINE 0 0 0
ata-WDC_WD10EFRX-68FYTN0_WD-WCC4J3 ONLINE 0 0 0
errors: No known data errors
At this point, we have a basic RAID1 (mirrored) ZFS pool so if a hard drive fails, it can be swapped out with a drive of the same make/model/capacity and there should be no loss of data. The basic capacity/free space available to the pool is the same as with a single disk, which you can verify with…
 ' df '.
Filesystem 1K-blocks Used Available Use% Mounted on
zredpool1 942669440 128 942669440 1% /zredpool1
You can safely skip this next part and go straight to STEP 4, but if you want to experiment by simulating a disk failure (and you have at least 3 disks ready), remove the 2nd disk from the Probox enclosure(!).
Now enter this: # touch /$zp/testfile; zpool status:
pool: zredpool1
state: DEGRADED
status: One or more devices could not be used because the label is missing or
invalid. Sufficient replicas exist for the pool to continue
functioning in a degraded state.
action: Replace the device using 'zpool replace'.
see: http://zfsonlinux.org/msg/ZFS-8000-4J
scan: resilvered 276K in 0h0m with 0 errors on Sat Apr 1 12:40:03 2017
config:
NAME STATE READ WRITE CKSUM
zredpool1 DEGRADED 0 0 0
mirror-0 DEGRADED 0 0 0
ata-WDC_WD10EFRX-68FYTN0_WD-WCC4J1 ONLINE 0 0 0
ata-WDC_WD10EFRX-68FYTN0_WD-WCC4J6 UNAVAIL 0 0 0
errors: No known data errors
To replace the “failed” disk #2 with disk #3, enter this:
time zpool replace $zp ${zfsdisk[2]} ${zfsdisk[3]}; zpool status -v
pool: zredpool1
state: DEGRADED
status: One or more devices is currently being resilvered. The pool will
continue to function, possibly in a degraded state.
action: Wait for the resilver to complete.
scan: resilver in progress since Sat Apr 1 13:30:20 2017
448M scanned out of 1.18G at 149M/s, 0h0m to go
444M resilvered, 37.03% done
config:
NAME STATE READ WRITE CKSUM
zredpool1 DEGRADED 0 0 0
mirror-0 DEGRADED 0 0 0
ata-WDC_WD10EFRX-68FYTN0_WD-WCC4J1 ONLINE 0 0 0
replacing-1 UNAVAIL 0 0 0
ata-WDC_WD10EFRX-68FYTN0_WD-WCC4J6 UNAVAIL 0 0 0
ata-WDC_WD10EFRX-68FYTN0_WD-WCC4J4 ONLINE 0 0 0 (resilvering)
errors: No known data errors
Once the resilver is done, issue another ‘ zpool status ‘:
pool: zredpool1
state: ONLINE
scan: resilvered 1.18G in 0h0m with 0 errors on Sat Apr 1 13:30:30 2017
config:
NAME STATE READ WRITE CKSUM
zredpool1 ONLINE 0 0 0
mirror-0 ONLINE 0 0 0
ata-WDC_WD10EFRX-68FYTN0_WD-WCC4J1 ONLINE 0 0 0
ata-WDC_WD10EFRX-68FYTN0_WD-WCC4J4 ONLINE 0 0 0
errors: No known data errors
And you will see that the original failed drive #2 that ended with “WCC4J6” is now gone from the pool and has been completely replaced with drive #3. Everything is back in order and the pool continues functioning with no downtime, and ONLY the “allocated data” has been copied from the “good” drive – ZFS RAID10 is MUCH FASTER with resilvering than a traditional RAID!
Now if you did this step, replace disk #2 in the Probox enclosure, then issue:
‘ zpool destroy zredpool1 ‘ and redo steps 1-3. Then go on to STEP 4.
If you already have all 4 disks ready to go in the Probox, you can now enter this:
STEP 4: Expand the ZFS RAID1 to zRAID10 using all (4) disks:
time zpool add -o ashift=12 $zp \
mirror ${zfsdisk[3]} ${zfsdisk[4]}
waitforresilver
And you’ll have a full zRAID10 ZFS pool, ready to receive – and share – files!
zpool status |awk 'NF>0'; df
pool: zredpool1
state: ONLINE
scan: resilvered 276K in 0h0m with 0 errors on Sat Apr 1 12:29:00 2017
config:
NAME STATE READ WRITE CKSUM
zredpool1 ONLINE 0 0 0
mirror-0 ONLINE 0 0 0
ata-WDC_WD10EFRX-68FYTN0_WD-WCC4J1 ONLINE 0 0 0
ata-WDC_WD10EFRX-68FYTN0_WD-WCC4J6 ONLINE 0 0 0
mirror-1 ONLINE 0 0 0
ata-WDC_WD10EFRX-68FYTN0_WD-WCC4J4 ONLINE 0 0 0
ata-WDC_WD10EFRX-68FYTN0_WD-WCC4J3 ONLINE 0 0 0
errors: No known data errors
Filesystem 1K-blocks Used Available Use% Mounted on
zredpool1 1885339392 128 1885339264 1% /zredpool1
Wait, what’s that?! Take a look at the available space and compare it to what we started with at the single-disk and RAID1 stages:
Filesystem 1K-blocks Used Available Use% Mounted on
zredpool1 942669440 128 942669440 1% /zredpool1
By adding another set of 2 disks, we have expanded the ZFS RAID10 pool’s free space to about twice the size - minus some overhead. Expanding on this concept – if you bought another Probox and another 4 disks of the same make/model/size, you could continue dynamically increasing the available free space of your pool simply by adding more sets of 2 disks.
Or, you could use larger drives in the 2nd enclosure (2TB, 4TB, etc) and ‘ zpool replace ‘ them one at a time to migrate the entire pool from Probox 1 to Probox 2. You don’t have to wait for a drive to fail before issuing a ‘ zpool replace ‘ command, as long as the “necessary options” mentioned above are set.
If you run into any problems and want to start over, you can issue:
zpool destroy $zp; zpool status
no pools available
And go back to STEP 1. WARNING: NEVER do ‘zpool destroy’ on a “live” ZFS pool; ZFS assumes you know what you’re doing and will NOT ask for confirmation! Destroying a ZFS pool (intentionally or not) pretty much guarantees data loss if it’s not backed up!
Now we can get to the “productive” part of running ZFS – sharing files with Windows.
STEP 5: Creating and Sharing ZFS Datasets with Samba
First we need to define a Samba user. You should only need to do this once, and you need to use an existing ID on the system – so, since I installed Lubuntu earlier with a non-root user named ‘user’:
myuser=user## change this to suit yourself
smbpasswd -a $myuser
New SMB password:
Retype new SMB password:
You will need to enter a password at the prompt and confirm it. The password can be the same as your non-root user’s Linux login or different.
Now we can define some “datasets” on our ZFS pool. ZFS Datasets are a bit like regular directories, and a bit like disk partitions; but you have more control over them in regards to filesystem-level compression, disk quotas, and snapshots.
myds=sambasharecompr
zfs create -o compression=lz4 -o atime=off -o sharesmb=on $zp/$myds ; chown -v \
myuser /$zp/$myds
myds=notsharedcompr
zfs create -o compression=lz4 -o atime=off -o sharesmb=off $zp/$myds ; chown -v \
myuser /$zp/$myds
myds=notsharednotcompr
zfs create -o compression=off -o atime=off -o sharesmb=off $zp/$myds ; chown -v \
myuser /$zp/$myds
df
Filesystem 1K-blocks Used Available Use% Mounted on
zredpool1 942669184 128 942669056 1% /zredpool1
zredpool1/sambasharecompr 942669184 128 942669056 1% /zredpool1/sambasharecompr
zredpool1/notsharedcompr 942669184 128 942669056 1% /zredpool1/notsharedcompr
zredpool1/notsharednotcompr 942669184 128 942669056 1% /zredpool1/notsharednotcompr
ls -al /zredpool1/
total 6
drwxr-xr-x 5 root root 5 Apr 1 15:09 .
drwxr-xr-x 29 root root 4096 Apr 1 14:29 ..
drwxr-xr-x 2 user root 2 Apr 1 15:09 notsharedcompr
drwxr-xr-x 2 user root 2 Apr 1 15:09 notsharednotcompr
drwxr-xr-x 2 user root 2 Apr 1 15:08 sambasharecompr
At this point we should have (3) datasets on the pool; one is Samba shared and has fast and efficient Compression turned on (similar to NTFS filesystem compression or “zip folder” compression, but better.) The second is not Samba shared and also has compression; and the third is not shared or compressed. All three have “atime” turned off for speed and to avoid disk writes every time they’re read from, but again you can change this per-dataset.
You can find more information on ZFS datasets here:
https://www.nas4free.org/wiki/zfs/dataset
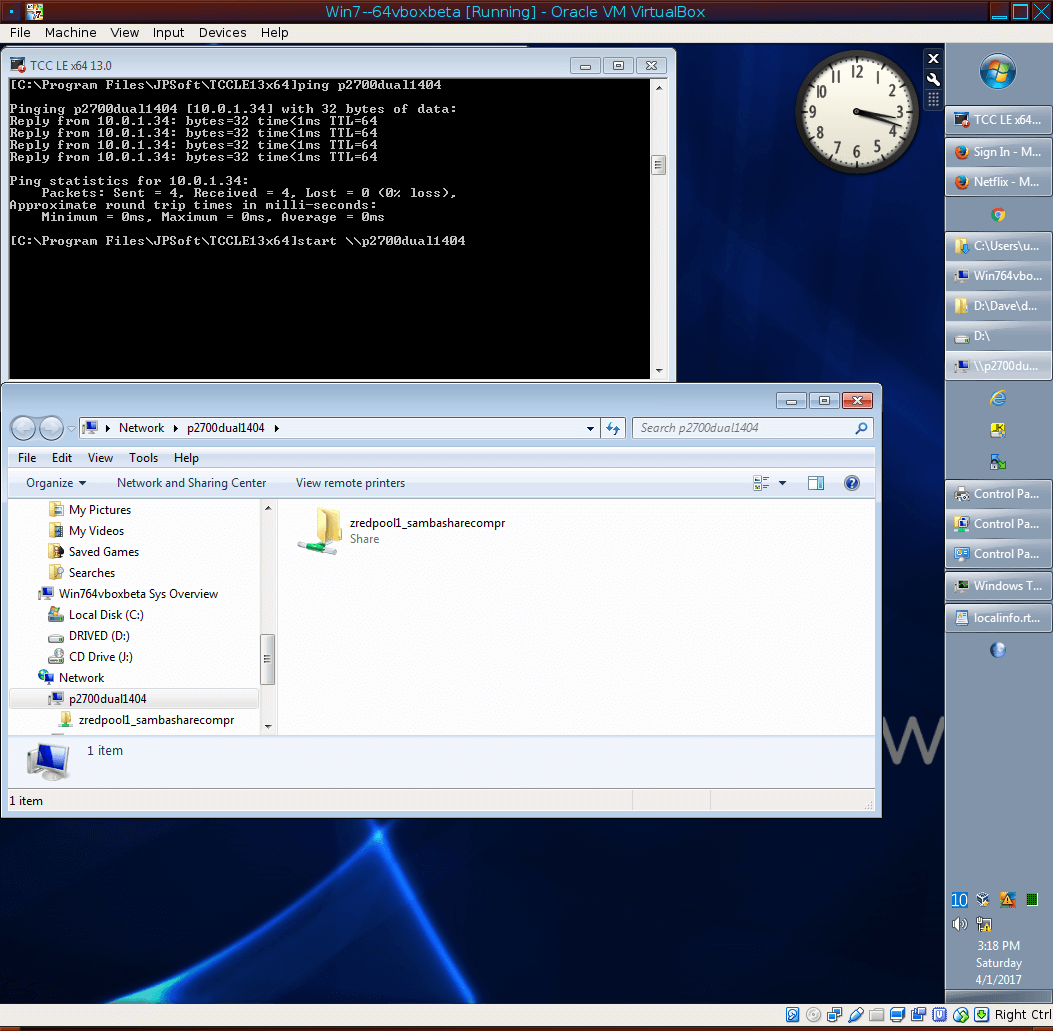
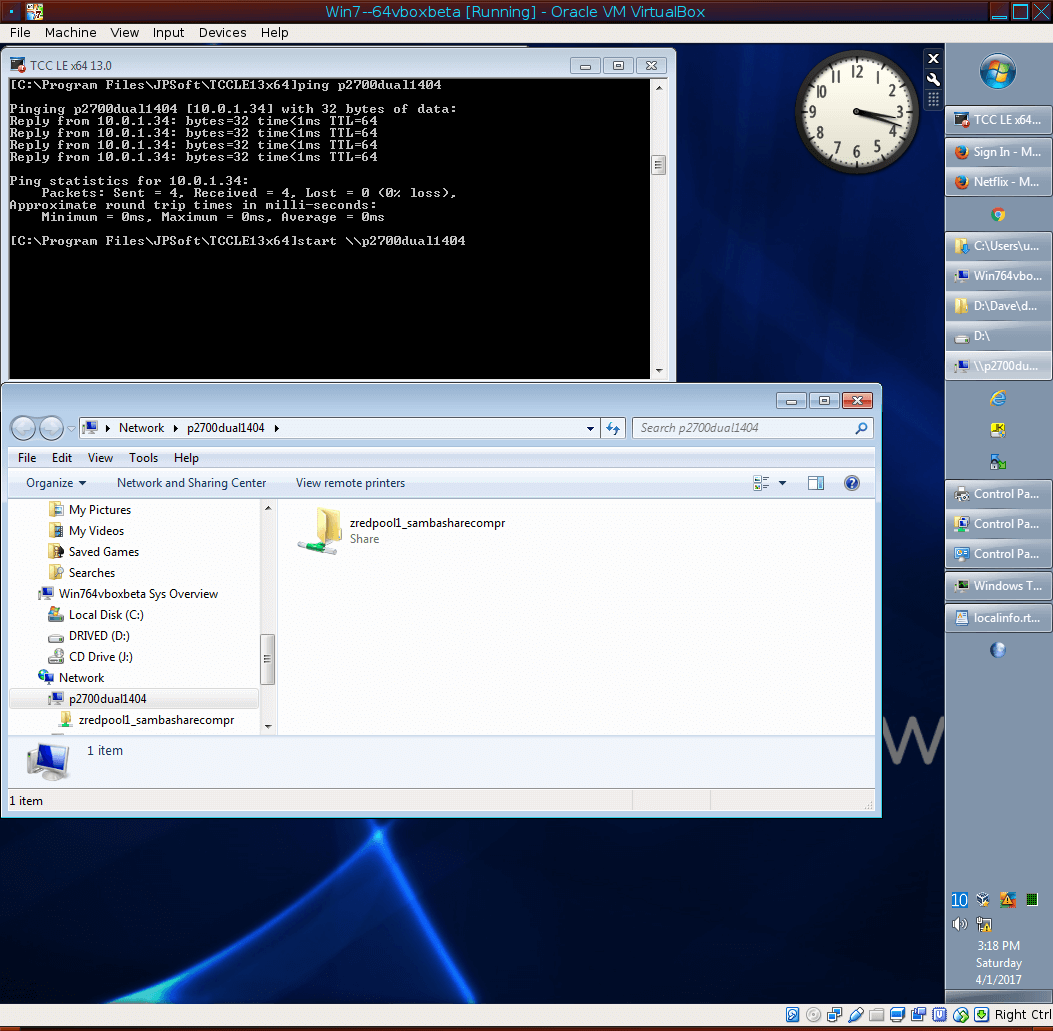
Now if everything has gone well, you can go to a Windows box on the same network and issue:
‘ start \\hostname ‘ # where “hostname” is the name of your Lubuntu install

Click on the share name displayed, and it should ask you for a username and password; use the same credentials that we set a password for above. You should immediately be able to start copying files to the Samba share, and control file/directory access on the ZFS server side using standard Linux file permissions (rwx), users and groups (user:root). Since file compression is set on this share, almost anything copied to it will use less space (except for already-compressed files like MP3s, movies, or executable binary programs – the ones that end in “.exe”.)
Yes, once you have your pool up and running, standing up a new Samba share is literally that easy with ZFS. 🙂
To conclude, let’s take a snapshot of our pool for safety:
zfs snapshot -r $zp@firstsnapshot
zfs list -r -t snapshot
More info on snapshots: https://pthree.org/2012/12/19/zfs-administration-part-xii-snapshots-and-clones/

